
Here's what you'll need


Pair of old denim jeans Studs
Bleach Scissors
Tape measure Thimble
Chalk/pencil/pen
Here's how the pants fit before:

How To:
STEP 1: We are first going to take the chalk/pen and mark the initial length of the pants; you should ideally do this in front of a mirror to get a better view of what you're doing. N.B. the first markings on the pants should be longer than the actual length that you want as we will be making a second cut later. Draw a diagonal line at the front and a curved line at the back as you can see below to achieve the hi lo effect.

STEP 2: Once you've established the first set of markings, were going to go ahead and take the tape measure and replicate the length of those markings from the waste on the opposite leg. This ensures that there's symmetry to the shorts. AT THE FRONT: measure the length of the inner and outer thigh and AT THE BACK: measure the inner and out thighs as well as through the center of the back pocket. Take a look below.
 |
| Front measurement |
 |
| Back measurement |
STEP 2a: No it's time to play connect the dots! using your chalk just connect the markings that you made on the opposite leg

STEP 3: Now your ready to begin cutting your shorts. Start cutting from the front and then continue to the back of the shorts. Be careful when cutting the shorts especially at the back, always cut through the leg and never through the crotch. I actually made the mistake of cutting through the crotch of the pants and had to sew it back up and be mindful of the front pockets so that you don't cut those either.
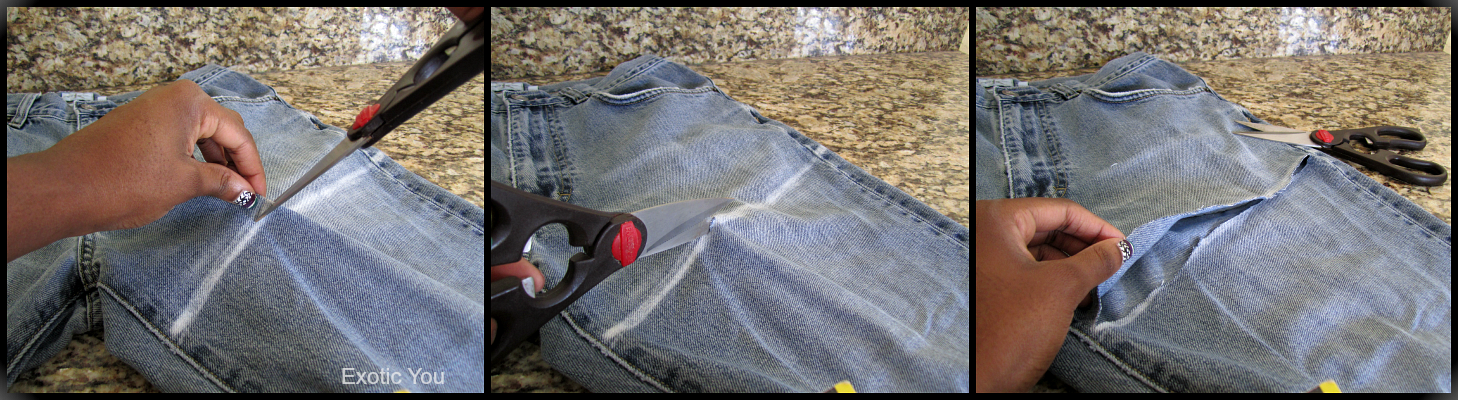
 |
| First cut |
STEP 4: After the first cut then you can determine how much more fabric you wish to take off after that. I opted to cutting my shorts a little shorter by repeating the above steps so that I could have a symmetrical hem line.
STEP 5: After I had achieved the length that I wanted, I began making random slits in the shorts to which will add to the distressed look. You could also use sand paper to further distress the shorts. Be careful not to cut through the pockets.

STEP 6: Before bleaching the shorts I wet them first, this makes for a gorgeous bleached effect. I squeezed out the excess water and crumpled the shorts into a small ball. I then took the bleach and splashed it onto random sections, I also rotated the shorts so I could pour the bleach on the back of the shorts while it was still in a crumpled ball. I left mine for about 1 1/2 hours until I got the desired look I was going for.

STEP 7: After they've been bleached to your liking, rinse then toss the shorts in the washing machine BY ITSELF. Using the washing machine will help to fray the slits and hem line of the shorts and it will get rid of all traces of bleach.

STEP 8: Once the shorts have been washed and dried, you can stop at this point, but I went on to add a little more pizazz by placing some pyramid studs along the front pocket. To secure the studs I used the thimble to help me close the clamps on the back of the studs without hurting my fingers.

STEP 9: YOUR DONE!! now you can style your new studded distressed shorts however you like them.
So.... you wanna see how mine came out? check out my upcoming video on how I style them and
I hope you enjoyed my DIY project, and if you try it out for yourself, make sure to let us know! Take Care...
Debbie
OMG so cool! I'll be starting on a revamping of my closet in January so I may try this. Can't wait to see the video!
ReplyDelete:) Well sounds like you'll have a lot of DIY projects as well
Delete