Showing posts with label diy. Show all posts

Saturday, 22 December 2012

Beaded Friendship Bracelet

Hello guys this is my final installment to the Blogmas gift series and it's all about the Friendship Bracelets; I opted to use beads instead of the typical embroidery thread and it was pretty simple to construct, so let's get started guys!!

Here's what you'll need:


Beads of your choice (I'm making a 5 bracelet set)
Stretch Cord (0.5mm thick)
Charms (optional)
Scissors 
Super glue 
Bowl 
Jump Rings (pictured below)

STEP 1: Take your beads apart and place in the bowl for easy access. To begin I cut off two 12 inch pieces of the stretch cord, I do however recommend that you purchase the 1mm thick stretch cord so you don't have to double it up as I did and then simply start threading the beads onto the doubled cord.


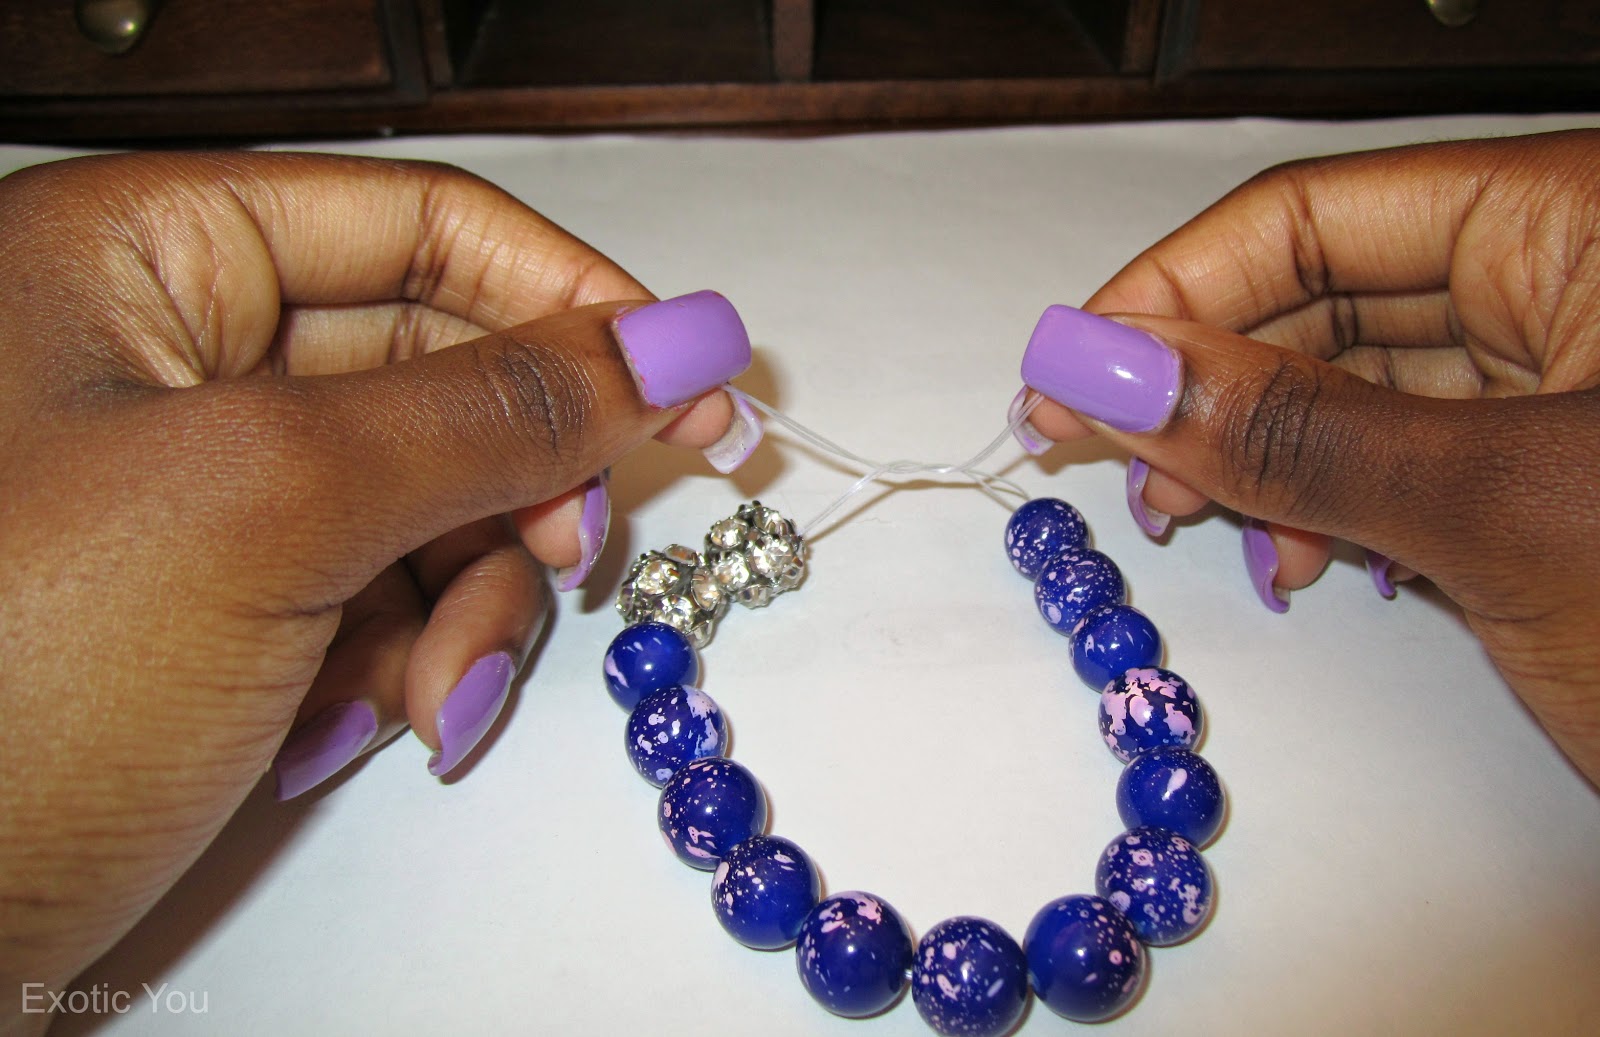
STEP 2: Once you've threaded the beads as how you want them, ensure that the bracelet fits comfortably around your wrist by doing a 'fit' as I call it. In the bracelet below I also added two diamante beads.


STEP 3: Once it fits correctly, then you can begin to knot the loose ends; make sure to pull VERY tightly on the knot so that it does not slip out of place. Continue to make about 3 more VERY tight knots to secure the bracelet.


STEP 4: Once the bracelet is tightened properly the knots should not come undone, then cut off the excess cord as close to the knot as possible.


STEP 5: To make sure that in the future the bracelet doesn't fall apart add some super glue to the knot to secure it. I used my glue gun, but super glue is better.


STEP 6: If you opted to add charms to your bracelet complete the above steps, then take your jump rings to attach them to bracelet so that they dangle when you put them on. See how they look below.


STEP 6: You're done!!!!! See it wasn't that hard! Once you've completed the set of bracelets and properly secured them, wrap them up in a gift box for your friend, I'm sure she'll love them.


I hope you enjoyed my short gift series and if you have any questions, be sure to leave a comment below. Take care guys and Happy Holidays!!!
Debbie

ALL MATERIALS WERE PURCHASED AT MICHAEL'S CRAFT STORE OR YOU CAN ORDER THEM OFF OF MICHAELS.COM.

Thursday, 20 December 2012

Homeade Body Butter Souffle

Hey guys! Today's Christmas DIY gift is also a skincare post. I've previously mentioned that I love making my own body creams/butter because I have really dry skin, this is also great for persons who have eczema as well. This is a great gift and I'll show you how you can make your own at home. You are more than welcome to make the recipe your own by using whatever ingredients you have it  will work out just as great! so let's jump into it.

Here's what you'll need:


Utensils

Saucepan                                                               Tablespoon
Metal mixing bowl                                                Wooden popsicle stick
Hand mixer                                                            Container to place body souffle


 Ingredients

Carrier Oils                                                                  Butters
Vitamin E Oil                                                                Shea Butter
Coconut Oil                                                                  Cocoa Butter
Extra Virgin Olive Oil                                                    Raw Mango Butter
Jojoba Oil                                                                     Olive Butter
Monoi de Tahiti Oil                                                       Illipe Butter
Castor Oil                                                                     Kokum Butter
Apricot Oil

Essential Oils
Lavender
Jasmine

How to

1. I will be using the double boiler method to melt my butters, but you can also opt to melt the butters in the microwave. To begin, add water to the saucepan and place on a low heat until the water begins to steam. The metal mixing bowl can now be placed on top of the saucepan in order to make the double boiler.


2.  You can begin adding your butters to the double boiler at this time by using the tablespoon. For harder butters such as the cocoa butter you might need to use a knife to break it into small chunks. I do not use exact measurements, I simply add the ingredients to my liking.


3. You must keep an eye on the butters while they are melting, AT NO TIME should the water in the saucepan or the butters come to a boil, if this happens turn off the heat and allow the butters to slowly melt on their own.


4. When everything has liquefied, remove the metal mixing bowl from the saucepan and place aside to cool. You can now stir the liquid with the wooden popsicle stick to ensure that all the butters are well combined.


5. After 15-20 minutes, the mixture should have cooled considerably and you can begin adding your carrier oils. Ensure that the liquefied butters and oils are mixed well by using the popsicle stick once again.


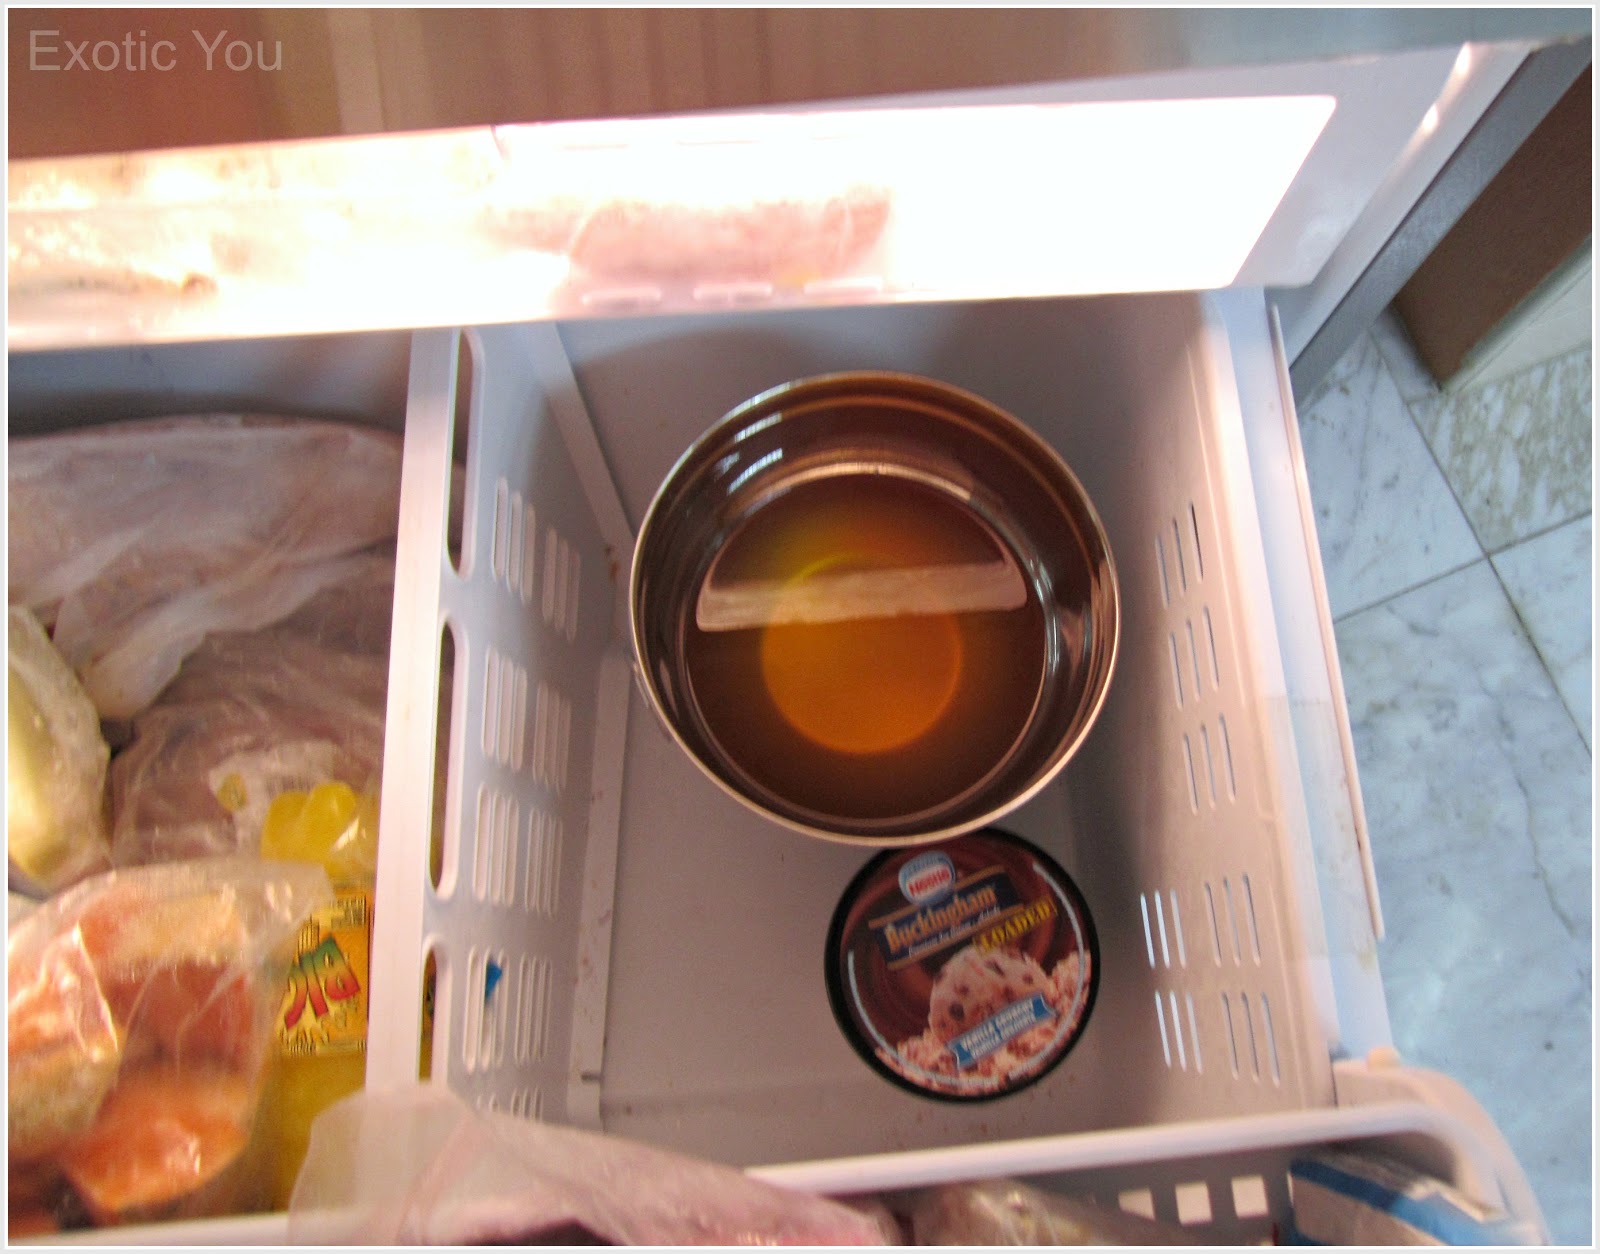
6. Place the mixture into the freezer. 


7. After another 15 minutes, remove the mixing bowl from the freezer. The mixture SHOULD NOT BE FROZEN,  it may have hardened a little around the edges but in the center should still be in a liquid state. At this point the mixture should also have an opaque appearance. Use the popsicle stick to stir the mixture once again, it should look similar to the image below.


9. Add your essential oils to the opaque liquid; once again I do not use exact measurements, I just add to my liking. Once you begin stiring the essential oils into the mixture it will begin to slowly firm up as you can see in the image below. Essential oils should never be added to anything to too warm/hot as they will evaporate and you will loose their benefits.


10. 'WHIP & REST': Now begin whipping the mixture with the hand mixer on a low setting. For me this is the most important step because the longer you whip the mixture the softer it will become and maintain that softness afterwards. After whipping the mixture for 10 minutes, leave it to rest for another 12 minutes.This is the 'whip and rest' step as I like to call it and it takes me about an hour and a half of whipping and resting to get it to the souffle consistency that I like. At every whipping interval I also like to increase the speed of the hand mixer.


N.B. At first the mixture will have the consistency of cake batter, then it eventually thickens to a marshmallow frosting consistency after the 'whip and rest' step is completed you can see how it gradually thickens in the pictures below.


11. Now after all that hard work you're done!! just use the tablespoon that we had earlier to spoon the mixture into container. After several hours the mixture would have solidified into to a light souffle texture. I use this as my everyday moisturizer and it isn't too oily as the Kokum butter helps the body butter souffle to absorb quickly into the skin


To spruce this up for Christmas add a bow or ribbon to your jar. Also remember to research your ingredients before using them.
Debbie

Wednesday, 19 December 2012

Cutesy Button Earrings

Hello again guys! Today's DIY gift will be making these cute button earrings that you see below. Check out the video on how you can do this yourself and always remember to have fun!


Tuesday, 18 December 2012

DIY Christmas Gifts!


Hey friends, we were recently tagged by fellow blogger Rane over by Haute People to participate in the Blogmas fun for 2012 so I wanted to do something fun, festive and also benevolent, so what better way than to introduce you guys to another short series on the blog which is dedicated to the whole spirit of gift giving. Now, if you're unsure of what to gift your female friends or family members this Christmas these quick and SUPER easy DIY projects will hopefully help you out, so from December 19 - 22 I will be doing 4 DIY projects just in time for Christmas.

Stay tuned for the Christmas series guys!
Debbie

Thursday, 13 December 2012

DIY: Renewing your Bridget Sandals

We all have grown to love our Bridget Sandals. They are really good quality sandals that we probably will have for years, however, even though its made of high quality leather, they are still susceptible to colour fading. But rest assured that you don't have to throw your sandals out or retire them. Bridget Sandals does offer a repainting and repairing service at a charge; however, there is a cheaper way to renew your sandals and it's by doing it yourself! 

It's easy to repaint your faded Bridget sandals or you can change the colour of your sandals to another colour. The acrylic paint I used can be purchased at Liguanea Drug and Garden Centre at 134 Old Hope Road, Kingston 6. The 'Pebeo' High Viscosity Studio paints cost approximately JM$400. You do get a lot of product for the price, and with that you can paint your sandals as many times as you like.


You will need gloves to protect your hands when painting and also a small paint brush for the actual painting.


 These are the results of two Cutaways that I repainted...


I hope this helps,
Shannon xoxo

Sunday, 9 December 2012

Distressed Shorts All Style Up!

Hi my lovely friends, here's the post/video that I promised you featuring the distressed, studded hi lo denim shorts that I created in this earlier post here. I hope you like and of course, always leave us a comment on what you think about the.


TTYL. Love
Debbie

Friday, 7 December 2012

DIY: Distressed & Studded Hi Lo Denim Shorts

Hey guys I'm here with a DIY for you!!!! This is my first attempt of creating my own bleached, distressed and studded denim shorts and I hope you like it. I purchased these high wasted jeans from a thrift store a while back and I have been eager to do this tutorial for you guys, I love the way they came out and I plan on doing more DIY clothing in the future, but until then enjoy this post and definitely let me know what you think of them in the comments :)

Here's what you'll need


Pair of old denim jeans                                               Studs
Bleach                                                                        Scissors
Tape measure                                                             Thimble
Chalk/pencil/pen

Here's how the pants fit before:


How To:

STEP 1: We are first going to take the chalk/pen and mark the initial length of the pants; you should ideally do this in front of a mirror to get a better view of what you're doing. N.B. the first markings on the pants should be longer than the actual length that you want as we will be making a second cut later. Draw a diagonal line at the front and a curved line at the back as you can see below to achieve the hi lo effect.


STEP 2: Once you've established the first set of markings, were going to go ahead and take the tape measure and replicate the length of those markings from the waste on the opposite leg. This ensures that there's symmetry to the shorts. AT THE FRONT: measure the length of the inner and outer thigh and AT THE BACK: measure the inner and out thighs as well as through the center of the back pocket. Take a look below.

Front measurement

Back measurement

STEP 2a: No it's time to play connect the dots! using your chalk just connect the markings that you made on the opposite leg


 STEP 3: Now your ready to begin cutting your shorts. Start cutting from the front and then continue to the back of the shorts. Be careful when cutting the shorts especially at the back, always cut through the leg and never through the crotch. I actually made the mistake of cutting through the crotch of the pants and had to sew it back up and be mindful of the front pockets so that you don't cut those either.


First cut

STEP 4: After the first cut then you can determine how much more fabric you wish to take off after that. I opted to cutting my shorts a little shorter by repeating the above steps so that I could have a symmetrical hem line.

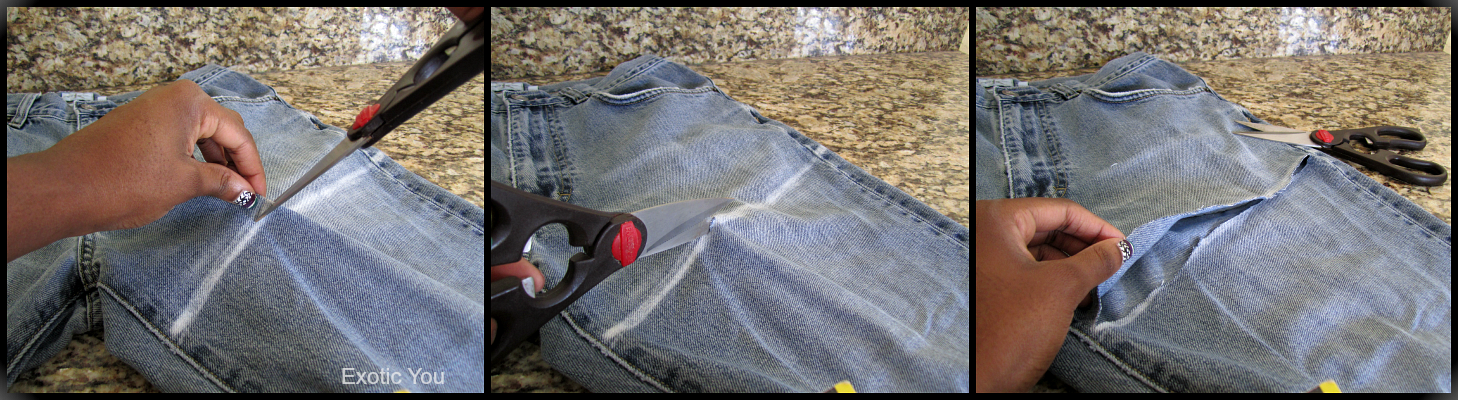
STEP 5: After I had achieved the length that I wanted, I began making random slits in the shorts to which will add to the distressed look. You could also use sand paper to further distress the shorts. Be careful not to cut through the pockets.


STEP 6: Before bleaching the shorts I wet them first, this makes for a gorgeous bleached effect. I squeezed out the excess water and crumpled the shorts into a small ball. I then took the bleach and splashed it onto random sections, I also rotated the shorts so I could pour the bleach on the back of the shorts while it was still in a crumpled ball. I left mine for about 1 1/2 hours until I got the desired look I was going for.


STEP 7: After they've been bleached to your liking, rinse then toss the shorts in the washing machine BY ITSELF. Using the washing machine will help to fray the slits and hem line of the shorts and it will get rid of all traces of bleach.


STEP 8: Once the shorts have been washed and dried, you can stop at this point, but I went on to add a little more pizazz by placing some pyramid studs along the front pocket. To secure the studs I used the thimble to help me close the clamps on the back of the studs without hurting my fingers.


STEP 9: YOUR DONE!! now you can style your new studded distressed shorts however you like them.

So.... you wanna see how mine came out? check out my upcoming video on how I style them and
I hope you enjoyed my DIY project, and if you try it out for yourself, make sure to let us know! Take Care...
Debbie

Friday, 25 May 2012

Red Rose Cuticle Oil

Maintaining healthy cuticles is key to gorgeous nails; contrary to popular belief cuticles should be pushed back rather than trimmed as they actually serve to keep bacteria from entering the nail bed and causing infections.

In order to prevent against dry, unhealthy looking nails it's important to moisturize your cuticles with a good cuticle oil; I'll show you a quick recipe for a Red Rose Cuticle Oil that I came up with;  you guys are welcomed to try and make for yourself , here's what you'll need:


Ingredients:                                                                      Tools:

Rose Absolute Essential Oil                                               Dropper bottle or cleaned nail polish bottle
Red Rose Fragrance Oil
Jojoba Oil
Olive Oil
Dried rose bud/leaves
Vitamin E Oil

How to:

1. First try to pick out a rose bud or two that's small enough to fit into your dropper bottle. This step is optional so you can skip it if you like.


2. Start adding your chosen carrier oils (Olive Oil, Jojoba Oil) along with your Vitamin E oil making sure to leave a little space for your other ingredients. I made the mistake of adding a little too much of the oils to the bottle in this instance.


 3. Once you have added your oils, the final touch would be to add your Rose Absolute Essential Oil and your Red Rose fragrance oil (which is also an optional ingredient).  If you're having problems pouring out your Rose Absolute Essential Oil then simply remove the stopper like I have done below. Shake vigorously thereafter and voila your done!!


4. Here's the finished product.


How to Use:
  • Add a few drops to a bowl of warm water and soak nails for a few minutes then proceed with your manicure.
                                                                       OR
  • After coming out of the shower place a few drops directly to the cuticles and gently massage to seal in moisture.

Benefits:

  • Rose Absolute Essential Oil: has mild bactericidal and anti-viral properties that may help to prevent against certain nail infections and fungus.

  • Jojoba Oil: has natural fungicidal properties and is similar to the body's own sebum so it's great for moisturizing and penetrating the nail and nail bed. 

  • Olive Oil: great for moisture and helps to 'carry' the vitamin E oil and rose absolute essential oil into the nail bed and cuticle.

  • Vitamin E Oil: makes nails stronger and less prone to breakage and peeling.
I've been using store bought cuticle oils for several years, but I recently started to make my own when I realized how easy it was to make. If you try this out let us know how it worked out for you.

Debbie

Friday, 11 May 2012

DIY: Eyeshadow Primer

Eyeshadow primers are great to use when applying eyeshadow to your eyelids; they help to block the oil secretion from your lid and this allows your eye make-up to last longer and it also gives the eyeshadow a base to adhere to which helps the colours to pop.

So for the longest while I have been searching for an eyeshadow primer in Hong Kong. I would go to cosmetic stores painfully explaining what I'm looking for in super basic English, but to no avail. So as always, if I can't get access to something, I try my hardest to make it myself. After doing some research I found a solution...homemade eyeshadow primer. I have been using this method since last October and it has been working great for me.

You will need:


  1. Hand/Body butter or cream. These are better to use than lotion because the consistency is thicker. Also, try to avoid scented body butters, because they may not be good to use around the eye area. I used Pond's skin cream.
  2. Foundation. Use any foundation of your choice. I used my MAC Studio Fix Fluid.
  3. Concealer. Try using a concealer that does not have a liquid consistency; creamy concealers are better. The NYX Concealer in a Jar is perfect for this.
  4. A small empty container. I got mine from a travel container set.
  5. Measuring utensil. For this I used tiny disposable spoons.

Method:


Portion out approximately equal parts for each ingredient; the concealer, foundation and body butter.


Add all the products to the container and mix well until perfectly blended.

The result:


I applied two layers of eyeshadow to different sections of my skin to demonstrate how great this homemade formula is. It also allows my eyeshadow look to last longer; up to 8hrs based on my experience. This is a great and cheap substitute for a store bought eyeshadow primer. 

I hope this helps
Shannon
Related Posts Plugin for WordPress, Blogger...