Tuesday, 11 December 2012

Hotel Review: Tropical Lagoon Heights Resort (picture heavy)

I made a recent post of my short stay in the gorgeous parish of Portland and I wanted to follow up with the review of the hotel that the bf and I stayed at for his birthday. It was a last minute decision to scurry off to the resort, but I was extremely happy with our stay there (even though it was just for one night) and I would definitely return.

The property is nestled on a hill in the San San area right next to other popular resorts and beaches such as Frenchman's Cove, Goblin Hill Villas and the Mockingbird Hotel, but this new kid on the block definitely stands out amongst the crowd. The Tropical Lagoon Heights Resort recently opened in November of 2011 and boasts a small yet intimate setting; there are a total of 10 suites/apartments available but they are also expanding the property as I saw the preliminary stages of construction being carried out for additional rooms.

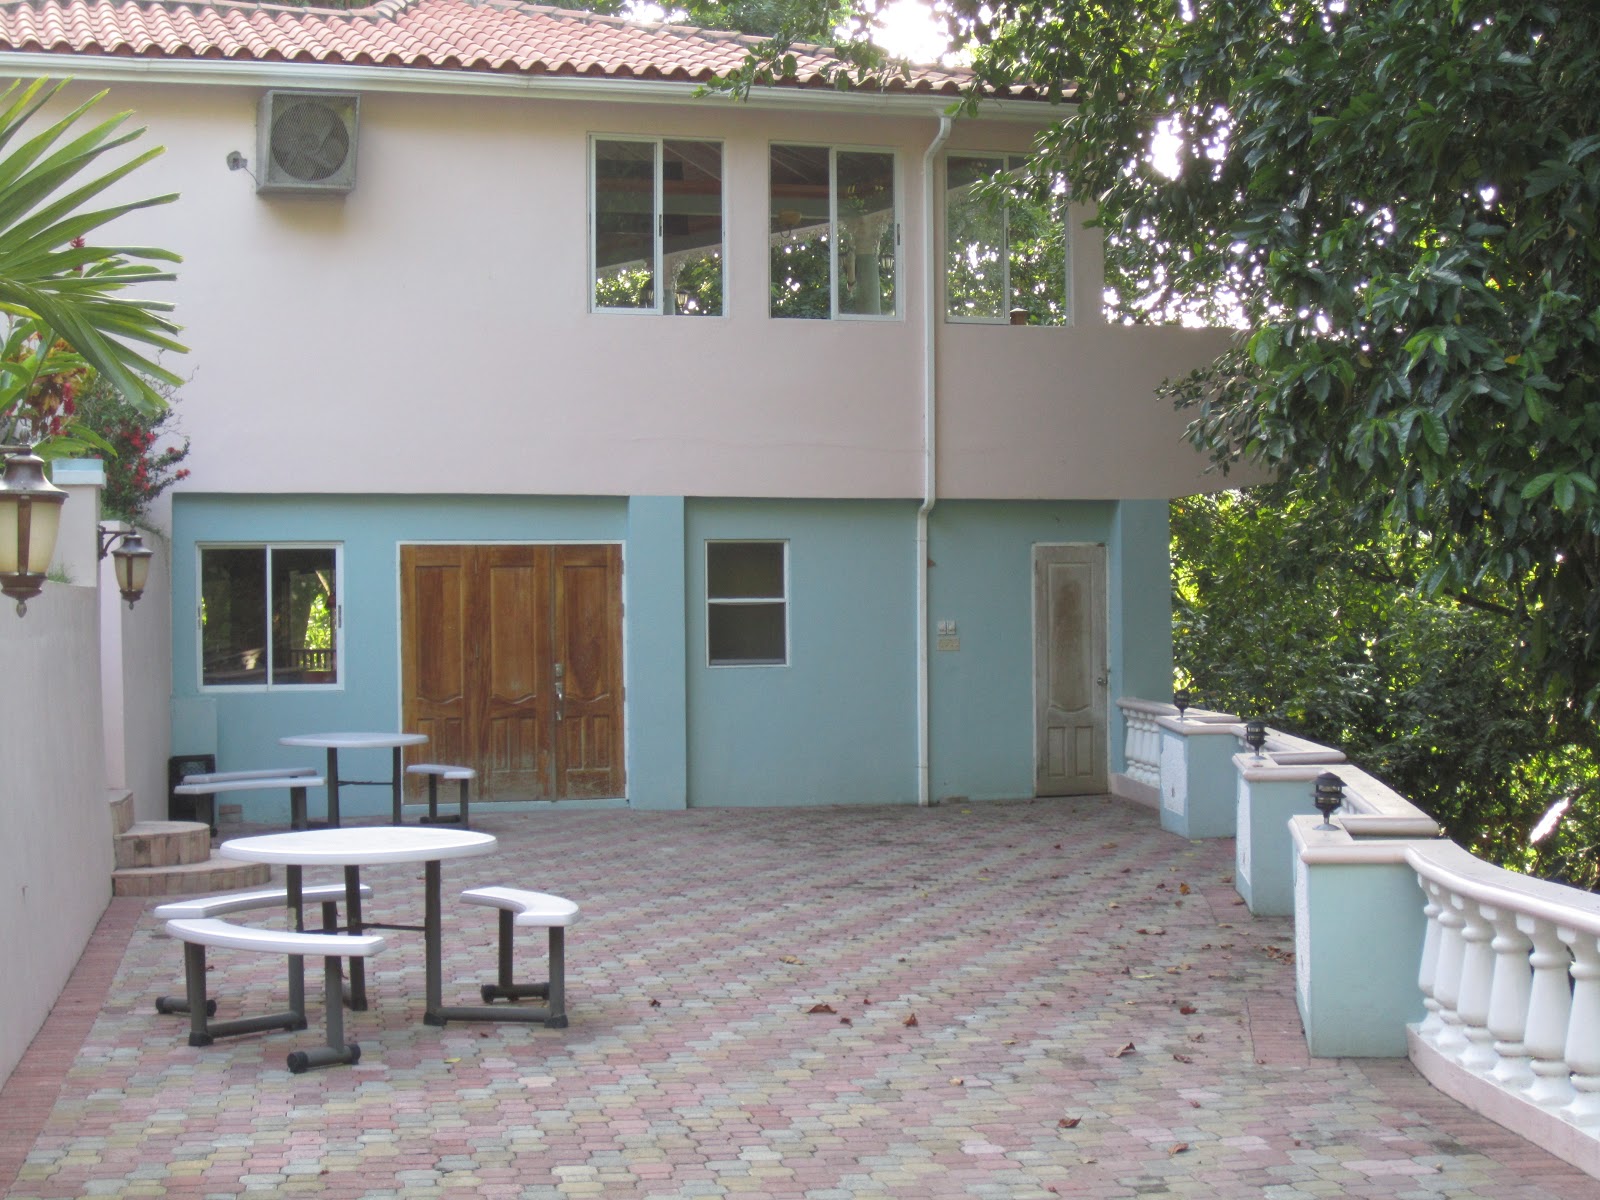
Main Office, Banana House & Plantain House

Sign at entrance to the resort


Service
The service was impeccable, and being that we were the only persons at the resort at the time, we had the opportunity to indulge in the private one on one attention that we received from our hostess Antonette and the other staff. Everyone was genuinely helpful and friendly and it made us feel even more at home; my only concern is that they would be extremely understaffed if a large group decided to check in at the last minute since I didn't see many employees present, so word to the wise if you're going to be travelling with a large group make sure to inform them in advance. Another disappointing factor was the fact that there are no telephones in the rooms, so that means if you need anything you have to walk to the main office or restaurant which can be a little annoying if you need something but don't want to leave your room.

Accommodations and Pricing
As I mentioned, there are only 10 suites/apartments currently available (they can be viewed HERE) and they are arranged in small clusters, of two or three rooms/suites. Some suites are larger self contained units with a full kitchen and a small living and dining area which can sleep four or even more guests and the smaller apartments are of course for  single or double occupancy. The prices were reasonable in my opinion and you can take a look at the rates HERE, our hostess was also kind enough to give us a further 10% off of the room rate which we were of course very happy about. All the rooms come equipped with a fridge, microwave, air conditioning, cable tv, cold/hot water and kitchenette or full kitchen.


Entrance to our Black Mango Suite


Kitchenette


View from bedroom


Food
Now I'm not very familiar with the parish of Portland nor the Port Antonio area so it was imperative for me that the resort we stayed at had an onsite restaurant. The dining area of the resort overlooked the lush vegetation and the Blue Lagoon. There is a separate breakfast, lunch and dinner menu provided in each suite, and you are given a continental style breakfast as part of the room rate. Menu selections were just ok in my opinion and a little bit pricey, but what we ordered was delicious nonetheless.

We asked to have dinner brought to us in the room

Jamaican breakfast

Entrance to restaurant


Beach
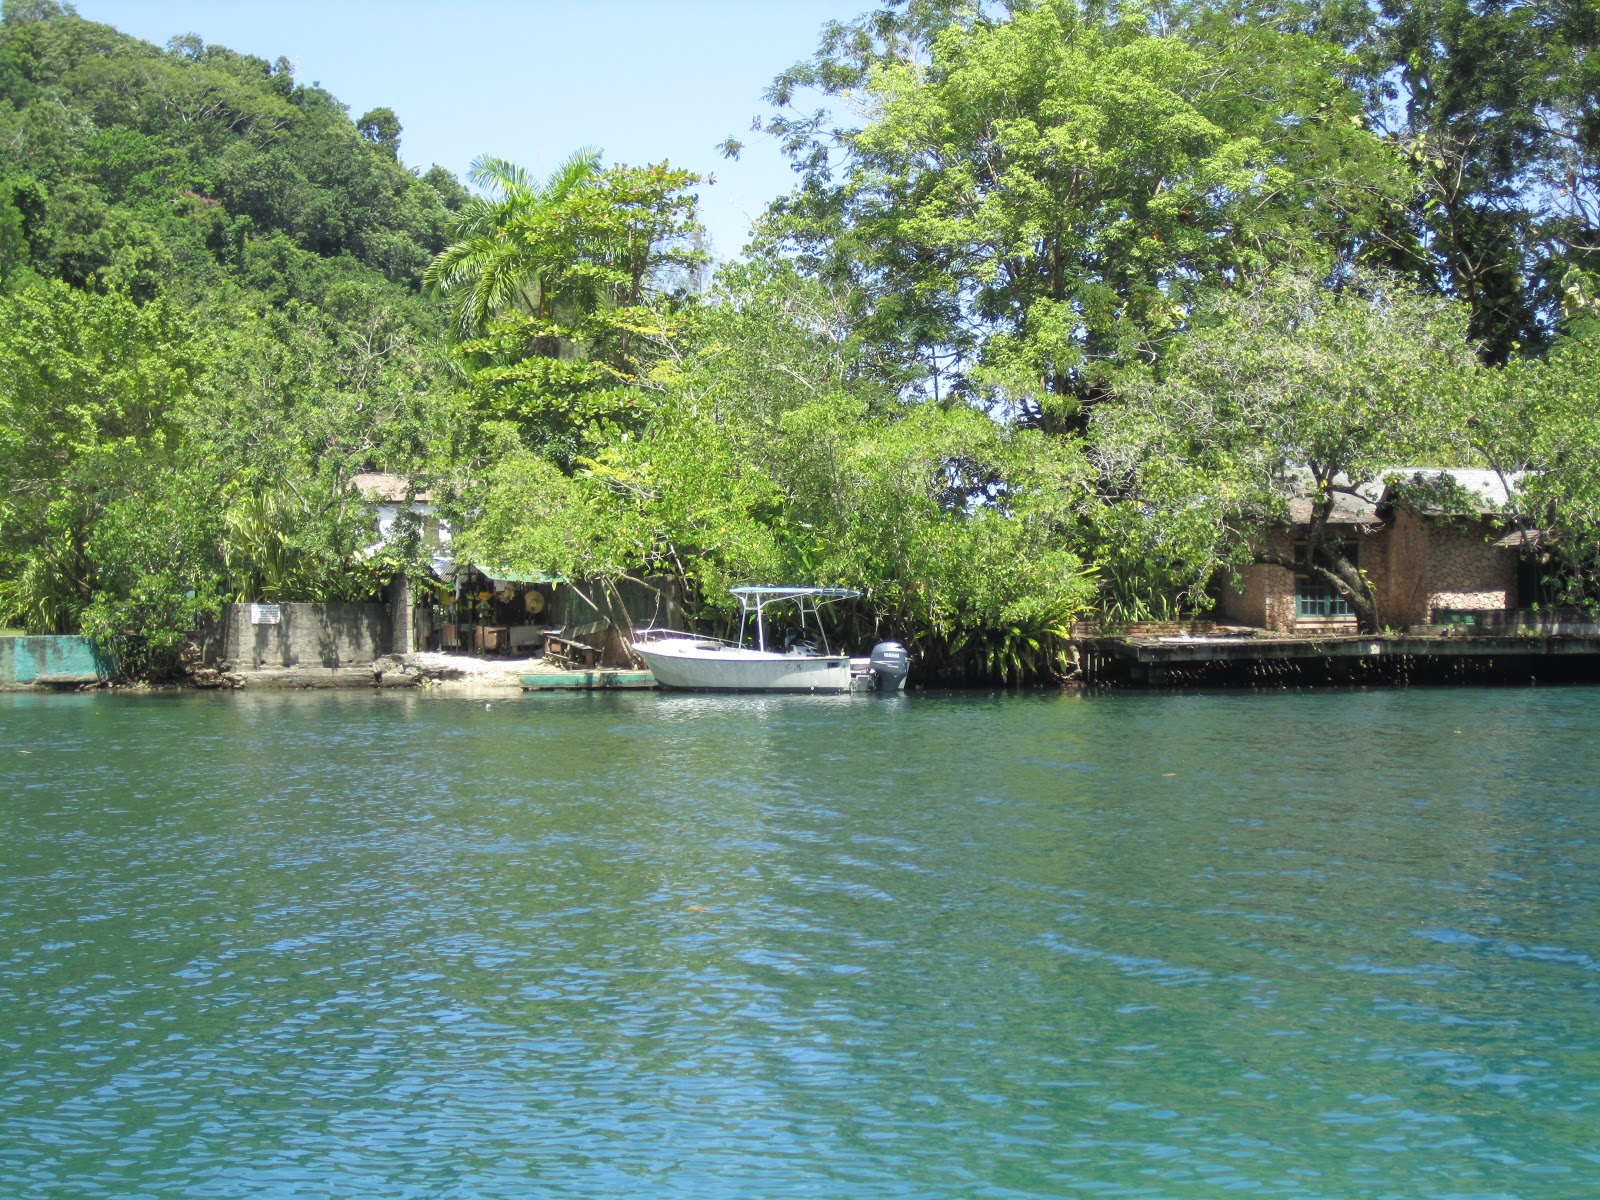
This by far was my favourite part of our stay at the resort, the hotel boasts a private beach which opens up into the famous Blue Lagoon, but getting to the beach however proved to be a very treacherous venture as the path leading to the beach starts out extremely steep but eventually levels out, it took us about 5 - 8 minutes to get to the beach. There is no life guard present at any point in time, so you do have to swim at your own risk, but life jackets are amply provided for the guests right on the beach. Another interesting point to raise about the beach is that the water is brackish, meaning that it is a mixture of mostly fresh mineral water and sea water and at times you could feel the drastic temperature difference of warm and cold as the water that emerged from a nearby mineral spring mixed with the warmer waters of the Caribbean Sea. The colours of the water were absolutely gorgeous as they changed from a deep bottle green to a bright turquoise colour. In addition to the beach, guests can take a 5 minute kayak ride across the water to the mineral spring which feeds into the Blue Lagoon; the water is freezing but it is crystal clear and looks enchanting.

Extremely steep pathway to the beach

And here's the slope : o

Sloping pathway turns to a long stairway


View of the entire beach

Blue Lagoon

Kayaking on the Blue Lagoon

View of the Blue Lagoon from the mineral spring

Kayaking out at sea

The turquoise waters at the beach

Mineral spring that feeds into the lagoon


Activities
Since it is a small resort the activities available on the hotel grounds were limited. Kayaking and snorkeling activities are available at no additional cost to the guests; snorkeling gear is provided by the hotel hostess upon request and there were about 5 or so kayaks available at the beach for guests to use at their leisure. Directly across from the hotel's private beach there is a small set of craft vendors, and bamboo raft guides which you could kayak over to. There is a disco/club on the property but of course we did not get to experience it because it was closed possibly because we were the only guests present at the time and lastly there are two swimming pools on the hotel grounds.

Pool near our room


Kayaks on the beach for guests


Activities & craft vendors across from the hotel beach

Entrance to the club below the restaurant


Rating 4/5
I would recommend this resort to anyone who is looking to explore Portland. As a newly opened resort is on the right path and I expect it to get much better as time goes by. The contact information can be found HERE if you're interested in spending some time there; I am definitely looking forward to spending time there again in the future.

Debbie

Also check out our review of Secrets Resort-Wild Orchid

Sunday, 9 December 2012

Distressed Shorts All Style Up!

Hi my lovely friends, here's the post/video that I promised you featuring the distressed, studded hi lo denim shorts that I created in this earlier post here. I hope you like and of course, always leave us a comment on what you think about the.


TTYL. Love
Debbie

Friday, 7 December 2012

DIY: Distressed & Studded Hi Lo Denim Shorts

Hey guys I'm here with a DIY for you!!!! This is my first attempt of creating my own bleached, distressed and studded denim shorts and I hope you like it. I purchased these high wasted jeans from a thrift store a while back and I have been eager to do this tutorial for you guys, I love the way they came out and I plan on doing more DIY clothing in the future, but until then enjoy this post and definitely let me know what you think of them in the comments :)

Here's what you'll need


Pair of old denim jeans                                               Studs
Bleach                                                                        Scissors
Tape measure                                                             Thimble
Chalk/pencil/pen

Here's how the pants fit before:


How To:

STEP 1: We are first going to take the chalk/pen and mark the initial length of the pants; you should ideally do this in front of a mirror to get a better view of what you're doing. N.B. the first markings on the pants should be longer than the actual length that you want as we will be making a second cut later. Draw a diagonal line at the front and a curved line at the back as you can see below to achieve the hi lo effect.


STEP 2: Once you've established the first set of markings, were going to go ahead and take the tape measure and replicate the length of those markings from the waste on the opposite leg. This ensures that there's symmetry to the shorts. AT THE FRONT: measure the length of the inner and outer thigh and AT THE BACK: measure the inner and out thighs as well as through the center of the back pocket. Take a look below.

Front measurement

Back measurement

STEP 2a: No it's time to play connect the dots! using your chalk just connect the markings that you made on the opposite leg


 STEP 3: Now your ready to begin cutting your shorts. Start cutting from the front and then continue to the back of the shorts. Be careful when cutting the shorts especially at the back, always cut through the leg and never through the crotch. I actually made the mistake of cutting through the crotch of the pants and had to sew it back up and be mindful of the front pockets so that you don't cut those either.


First cut

STEP 4: After the first cut then you can determine how much more fabric you wish to take off after that. I opted to cutting my shorts a little shorter by repeating the above steps so that I could have a symmetrical hem line.

STEP 5: After I had achieved the length that I wanted, I began making random slits in the shorts to which will add to the distressed look. You could also use sand paper to further distress the shorts. Be careful not to cut through the pockets.


STEP 6: Before bleaching the shorts I wet them first, this makes for a gorgeous bleached effect. I squeezed out the excess water and crumpled the shorts into a small ball. I then took the bleach and splashed it onto random sections, I also rotated the shorts so I could pour the bleach on the back of the shorts while it was still in a crumpled ball. I left mine for about 1 1/2 hours until I got the desired look I was going for.


STEP 7: After they've been bleached to your liking, rinse then toss the shorts in the washing machine BY ITSELF. Using the washing machine will help to fray the slits and hem line of the shorts and it will get rid of all traces of bleach.


STEP 8: Once the shorts have been washed and dried, you can stop at this point, but I went on to add a little more pizazz by placing some pyramid studs along the front pocket. To secure the studs I used the thimble to help me close the clamps on the back of the studs without hurting my fingers.


STEP 9: YOUR DONE!! now you can style your new studded distressed shorts however you like them.

So.... you wanna see how mine came out? check out my upcoming video on how I style them and
I hope you enjoyed my DIY project, and if you try it out for yourself, make sure to let us know! Take Care...
Debbie

Wednesday, 5 December 2012

Fall/Winter Nail Colours

Now on our wonderful little island of Jamaica, it's pretty much a tropical climate 365 days of the year but that doesn't mean that we can't keep up with fall trends even though we don't really have a 'fall season' per say. I picked out some colours that I love and I think they  would be perfect for the fall season, and oh! your gonna see some bright colours thrown in there as well, I just had to add a few brights to reflect our island heat :)

I also failed to mention that I have a lot of nail polishes so this is gonna be a mega nail polish show and tell, I just couldn't choose only one, so sit back relax and enjoy the blog post

Blues

These are great for adding a pop of colour or if you want an alternative for black, Light My Sapphire is perfect!

Sally Hansen: Pacific Blue | LA Girl: Dance Studio | OPI: Light My Sapphire


Glitters 

Great for layering over other colours

Wet 'n' Wild: Kaleidoscope  | Sally Hansen: Strobe Lights| China Glaze: Snow Globe | Sally Hansen: Ice Queen


Plums and Purples

The darker purple shades are great for vamping up your look

OPI: Ate Berries in Canaries | Wet 'n' Wild: Eggplant Frost | Revlon:Plum Attraction


Reds

The vibrant colour of the Christmas season

Wet 'n' Wild: Red Red | Revlon: Cherries in the Snow | Revlon: Raisin Rage


Whites and Metallics

Love these colours on accent nails or for creating unique nail art designs, and a good gold nail polish is so hard to find but Charge It! is a gorgeous yellow gold. 

China Glaze: White On White | Wet 'n' Wild: Metallica | Sephora by OPI: Charge It!  | Sephora by OPI: Already Famous

I unfortunately didn't have any darker green colours in my collection, but I would have definitely added that to my favourites for fall.
Do you have any favourite nail polishes for fall? Let me know...
Debbie

Monday, 3 December 2012

Get Ready With Me!

I am the type that during my exam period, I completely neglect myself and am completely engulfed in my studies until they are over. After feeling extremely overwhelmed I decided to take a study break and  headed to the movies to watch 007 Skyfall...which I must say was an awesome movie! You can check out the video below of me getting ready.


Hope you're having a wonderful day!
Shannon

Sunday, 2 December 2012

1 Day...2 Events! (picture heavy)

Two weekends ago we decided to attend a few events that were going on over and luckily for us we could kill two birds with one stone so we attended both the Health, Home and Garden 2012 Expo as well as the Beauty and Health Care Expo 2012. Expos such as these are a great way of finding out what the Jamaican market has to offer as it relates to health and beauty of course, and as Jamaican beauty and fashion bloggers we figured these expos would be right up our alley.

Health, Home and Garden Expo 2012

Admission: JMD$500 for adults
Venue: National Arena
Date of event: Rescheduled to November 9 - 11, 2012 because of Hurricane Sandy

Overview:
This event was not exactly our cup of tea as it was more geared towards home improvement, gardening, furniture and home decor, and companies which manufactured or sold specialty home related items. Now don't get us wrong it was a fantastic event, well executed and very organized. The floor plan allowed you to walk around with ease and besides the huge array of home/house related booths there were also banks, insurance companies, health test booths, etc. There were also live demonstrations, giveways, discounts and free sampling from Lasco and other food booths. When we own our own homes then we can appreciate this event even more, but it was great to see the wide variety of home decor items and companies that are in Jamaica, you actually don't need to go shopping outside of Jamaica if you're looking for unique pieces because it's all here! It was interesting to see how fashion actually inspires home decor as well. Our favourite booths were Matahari, they had gorgeous, but very expensive home decor items and also Custom Furnishing and Joinery Limited they have exquisitely made custom furniture/cabinetry/closets...virtually anything!


Shannon & I at the Flow booth


Matahari


Custom Furnishing and Joinery Ltd.


Beauty and Healthcare Expo 2012

Admission: FREE
Venue: Pegasus Hotel
Date of event: November 11, 2012

Overview:
*Kiss Teet* (as we say in Jamaica). Where do we start? We were expecting a whole lot more from this even quite honestly and we were not impressed to say the least. The booths showcased the typical hair products that you would normally find in beauty supply stores in and around Jamaica and the prices of the products were not reduced at all, for us an expo should showcase products at a cheaper/discounted price and honey these prices were not cheap. It was a bit crowded and when we initially arrived we were greeted by a very loud person performing on stage... ah boy! Apart from a very crowded L'oreal booth, we did not see any other makeup retail booths and there were not many locally made natural hair and beauty products being showcased besides Tropic Isle (manufacturers of Jamaican black castor oil products). We were hoping that it would have been more of a learning expo, but it was simply a showcase of products...with hardly any samples of these products and, how do you classify this as a beauty expo when it seemed to be more centered around hair and hair care products, what about makeup, nail care, etc? The highlight of the night however was meeting Youtube guru JamaicanMakeupArtist at the Motions booth and receiving some free goodies (which we cannot mention *wink*).


Hope you enjoyed!
Debbie & Shannon
Related Posts Plugin for WordPress, Blogger...